This post may contain affiliate links and ads. Read our disclosure policy here.
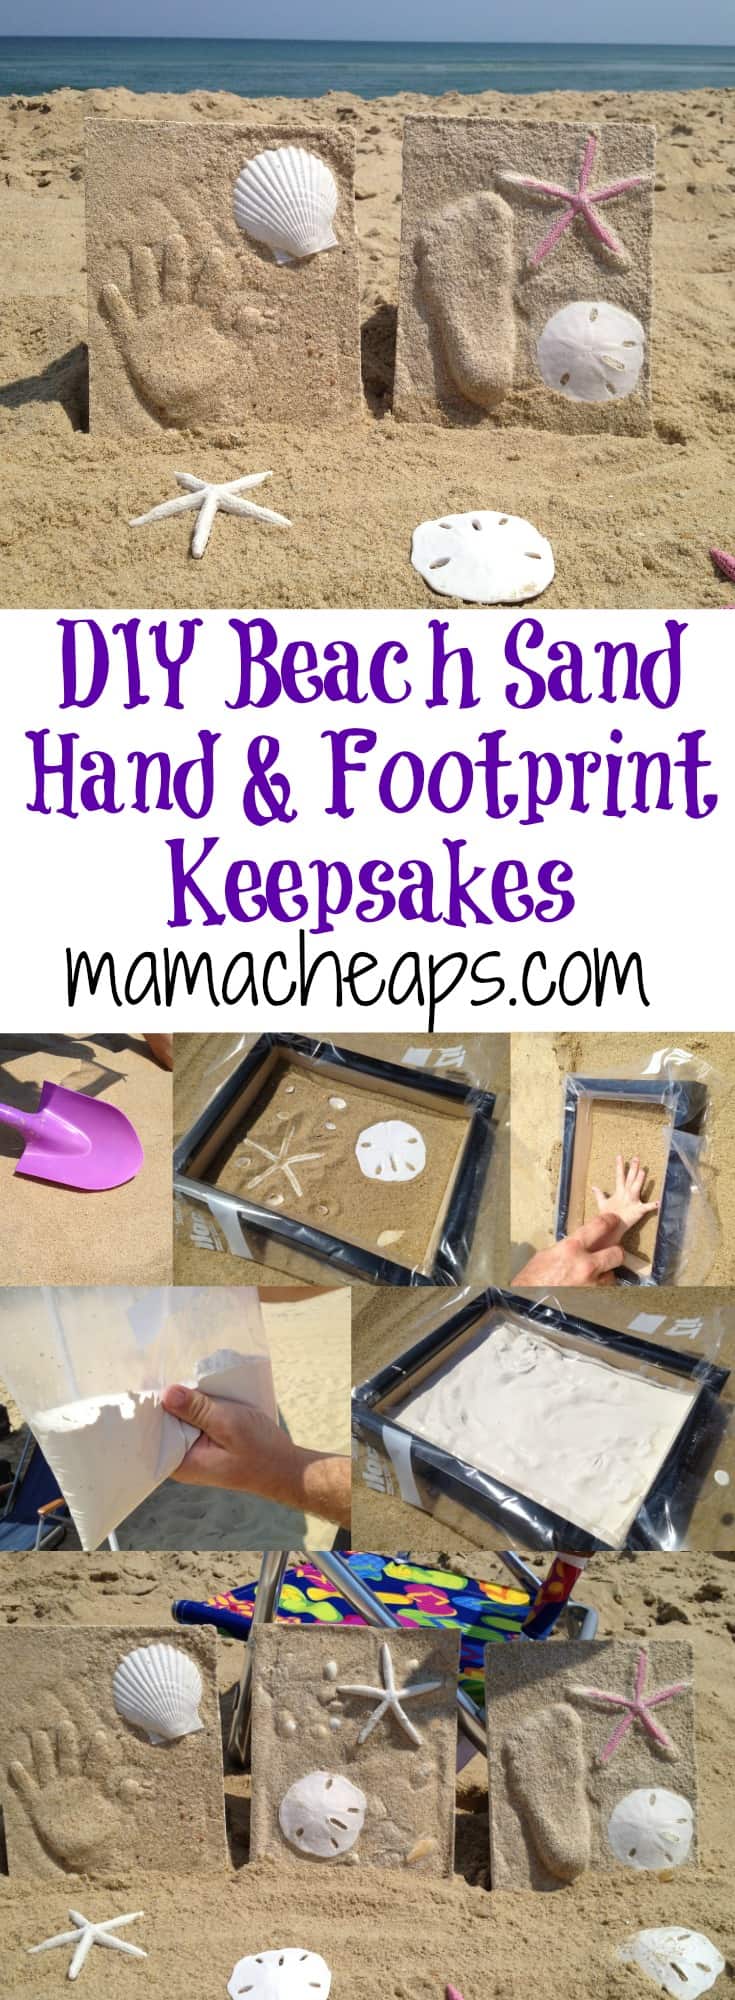
On your next trip to the ocean, try making these awesome looking beach sand handprint or footprint keepsakes! They look awesome and make a fun piece of beachy decor for your home.

Summertime! That means parades, cookouts, picnics, warmer weather and around these parts – BEACH SEASON! We are only about an hour and a half from the nearest beach and every year we try to get to the ocean at least once between Memorial Day and Labor Day. The past few years (minus last year when I was way too pregnant to travel so far) we have spent an awesome week in the Outer Banks, NC. No matter what beach you may find yourself on this summer (even the kids’ sandbox would work), check out this incredibly cool keepsake craft you can make while out soaking up the sun.
Beach Keepsake Materials
Here’s what you’ll need:
- Sand
- Water
- 8×10 shadow box (find at your local craft or big box store)
- Beachy decor to decorate your project – shells, starfish, sand dollars, etc. Find ’em on the beach or buy them at a craft store (we found ours at Big Lots).
- Plaster of Paris (we got a decent sized tub because we knew we wanted to make several prints)
- 2 Ziploc freezer bags – one to mix the Plaster of Paris in and another to cut open and cover frame with to keep plaster off of the frame.
- Optional – we used balsa wood and made a really simplistic frame to set inside of the shadow box frame and protective ziploc bag covering. This was only for spacing and keeping the plaster off the frame. We made this before we left home and brought it with us. Again, totally optional and not necessary if you wanted to skip it.
On our first run we were just experimenting. We were getting used to working with the Plaster of Paris. We made a frame without any hand/foot prints in it.
How to Make Your Beach Keepsakes
First you need to find a clean patch of sand and smooth it over. Remove any rocks or shells that might be sticking out of the surface. The first attempt was using dry sand. That worked okay for shells, etc. However when you’re attempting hand/footprints wet sand worked much better to hold the shape.

Set your frame in the sand and lay shells and other decorations upside down. (Make sure that the “pretty” sides that you want on display are face DOWN in the sand. You will be pouring Plaster of Paris over the top.)


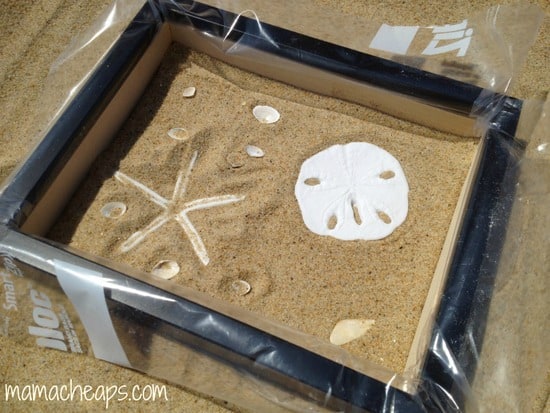
When you are happy with your arrangement it’s time to mix your Plaster of Paris. We brought bottles of water, a ziploc freezer bag and the plaster with us onto the beach. We mixed it together in the bag and then poured it directly on top of the entire frame area.
You can use your finger to smooth the back. (Lumps are okay, just make sure that the entire area inside the frame is covered with plaster.)


Let entire thing SIT untouched for about 30 minutes. The plaster has to set until it has completely hardened.

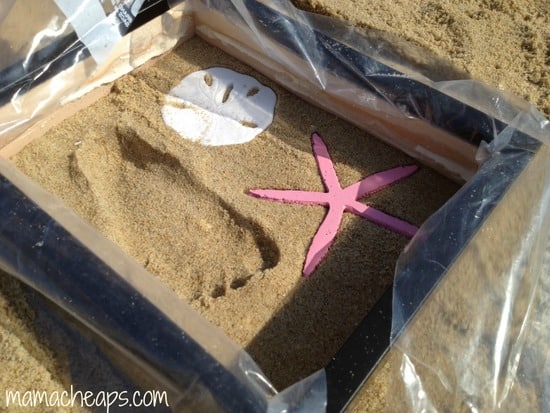
Here’s what it will look like from the front. The sand on top of the shells, etc will get brushed away. An old toothbrush works great for this!

Assembling the Final Project
Gently pop your frame off. We left these outside in the sun for an entire day to ensure that they were completely set. Once your design is brushed/cleaned off you can set it inside of the shadow box for an instant gift, decoration, vacation keepsake (or all of the above).
After our practice round, it was time to add some hand and footprints! This time we used wet sand. We started with the print, pressing Lily’s hand and foot into the sand to make sure it left a decent indent. Then we filled in the remaining area with our starfish, sand dollars and shells.


Our finished unframed masterpieces!


If you end up giving these beach handprint keepsakes a try, let us know how they turned out!
Pin this Beach Handprint Keepsakes Tutorial to Pinterest!
Other posts you might enjoy…
Easy Beach Bears Pudding Cup Snacks

DIY Dollar Store Beach Baking Set for Creative Play

15 MUST-PACK Best Baby Beach Gear Items + Printable Packing List

Fish Food – Easy Beach Themed Snack Mix

This is so creative. Love it!
Thank you!
I love this! What a creative way to make a keepsake of a beach trip.
I’m glad you like it! They really did turn out so cute!
Thank you for posting, i can’t wait to try this!
Thanks so much for sharing this. We took our kids for their first beach vacation this past week and made these for them to remember it by. We had fun making it and they turned out great!!! Thanks again!!
That is too cool! Thank you for sharing – I’m so glad they turned out great! :)
Hi! I know you posted this a couple of years ago so I hope you are still able to answer my question—I love this! Wanted to know if I am supposed to leave the glass in the frame while I am doing the project? I’m a little confused. Thanks in advance!
Hi Jennifer! Yes, I left the glass in – you will need to have the glass in the frame to catch the sand and hold it inside. If you’re adding a quote to the outside of the glass like I did, you can add that before you add the sand or after the shadowbox is completely sealed up with the sand/shells/picture. :)
Thanks so much for getting back to me so fast. That is definitely an unusual trait among this kind of community. I appreciate it greatly. I will definitely be doing this awesome project.
Thanks!
You’re very welcome! :)
Did you put the finished product back in the shadow box for display? If so, were you able to hang the shadow box or does it have to lay flat? If you were able to hang it, how did you keep the finished product from falling forward in the shadow box?
Yes, if I recall correctly, we hot glued the plaster creation to the back of the shadowbox, which helped to hold it up (and not fall forward) when hanging on the wall.