This post may contain affiliate links and ads. Read our disclosure policy here.
This post is part of a Halloween Craft Challenge sponsored by Pro World. We received vinyl samples to use as inspiration for this project. No compensation was received. All opinions are 100% our own.

Halloween is just around the corner! I absolutely LOVE this time of year, especially when it comes to all of the crafts I tend to make. This is the last bit of free time I seem to get each year – before the full-on craziness of holiday deal season erupts and I spend every spare minute finding and posting those amazing bargains!
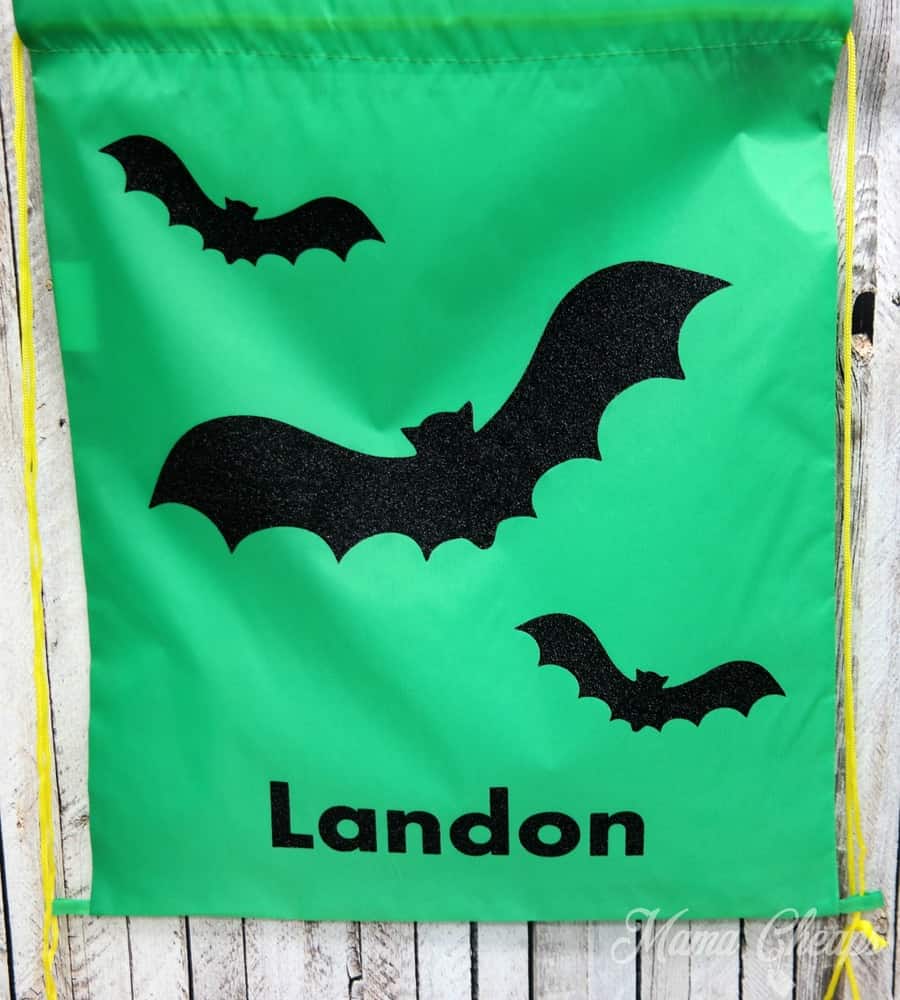
I was in the dollar store the other day and came across these drawstring bags. They are a light plastic/nylon sort of material and I thought they might work well for treat bags or even for sending the kids to school with their Halloween costumes. Last night I decided on bats for Landon’s bag and a big jack o’lantern face for Lily’s bag. I found the shapes online and imported, then traced them in my Silhouette Studio software.
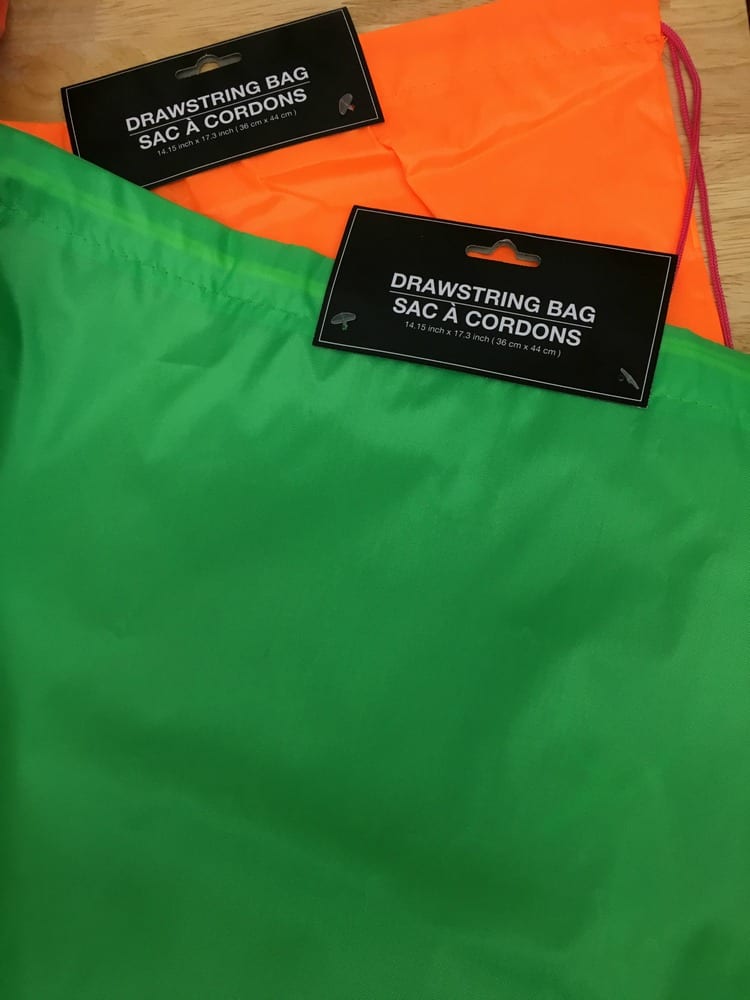
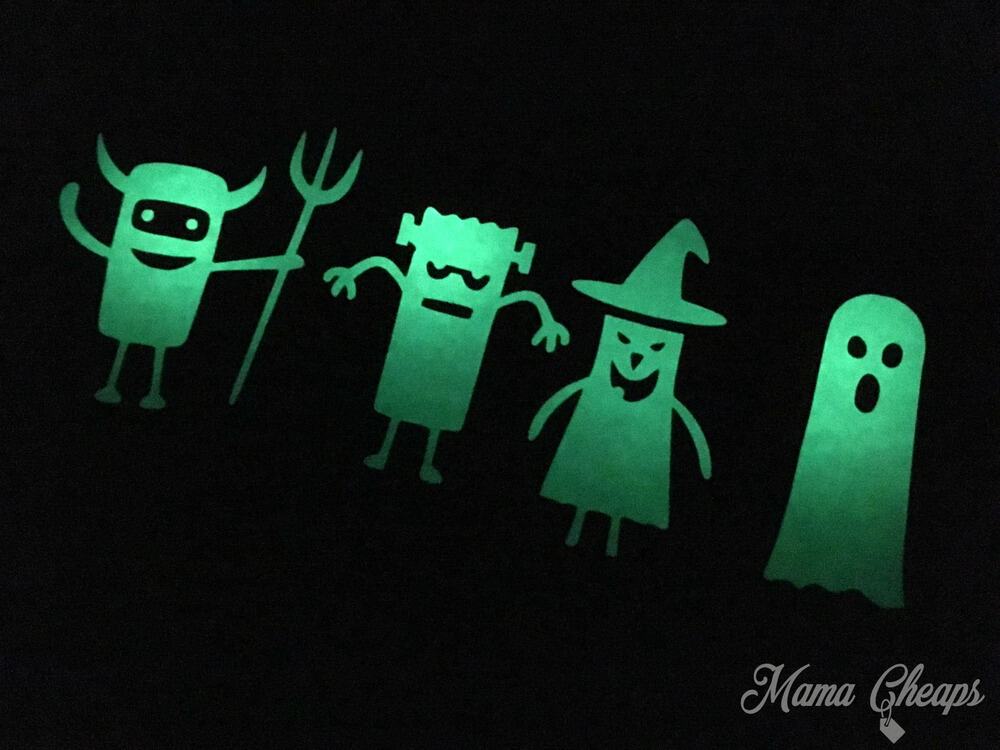
Next it was time to decide what vinyl might be the best choice. Pro World sent me several rolls of heat transfer vinyl to play around with and I finally narrowed my selection down to black glitter HTV for the front of the bags and then I used glow in the dark (WHAT!) HTV to stick some little trick or treat ghoulies on the back!
I cut my vinyl out and weeded it while my heat press warmed up (320 F).

So cute, right?
Next it was time to lay my vinyl out on the front of the first bag. I have to be honest – I was a little nervous to press these bags. I’m still learning the ropes with my heat press and up until last week I used to use an iron for all of my pressing. I felt sure the iron would have melted the bag material in seconds flat. I figured the heat press would stand a better chance, but I decided to press in very small time increments just to be on the safe side.
Here are the bag fronts, all laid out and read to be pressed.
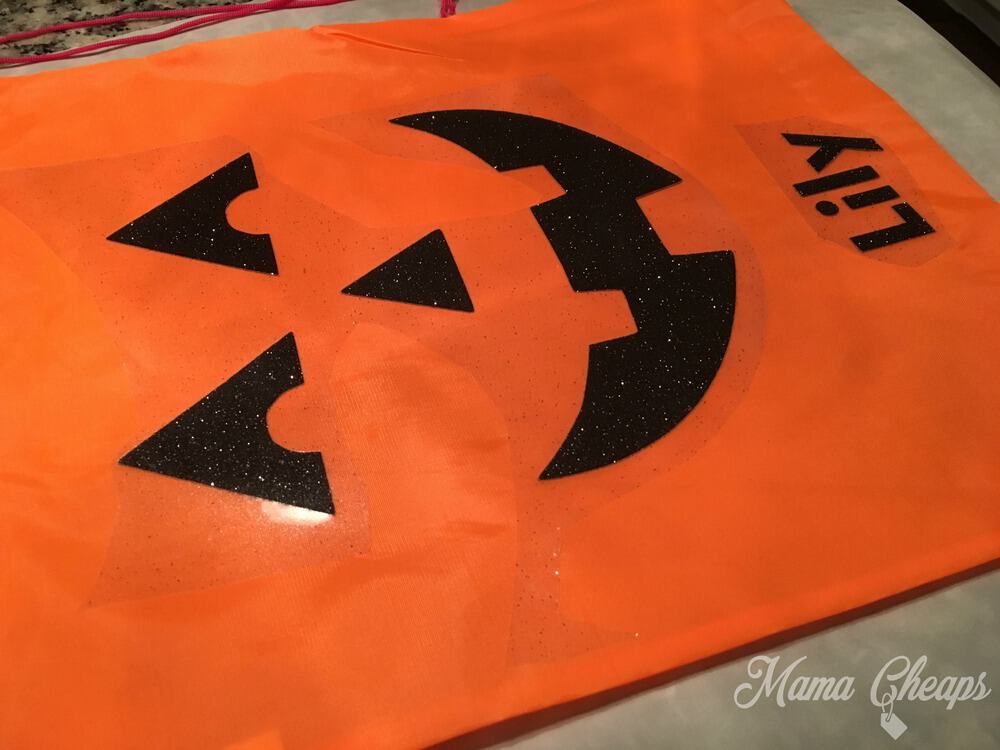
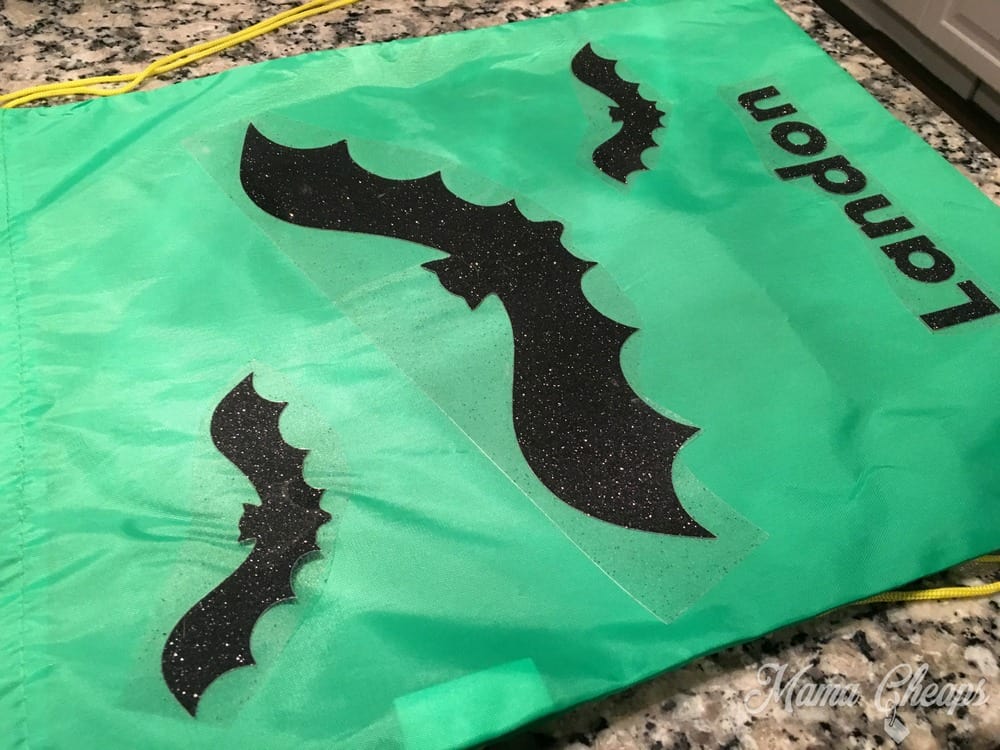
I only pressed the bags for two 5 second intervals at 320 F (with a teflon sheet over the bag). Then I removed the clear backing on the vinyl and placed the teflon back over the bag for one more quick 3 second press. The black glitter HTV adhered BEAUTIFULLY. I really couldn’t believe how snazzy they turned out!

The backs of the bags came out great too! I put the strip of ghoulies cut in glow in the dark HTV on the back of the bags and pressed following the same directions as the black glitter vinyl.
Here they are in the dark. I mean, can you even?!!?!?!
This project would work great on almost any fabric-type bag you have or you find at the store. For $1 per bag (before adding the vinyl) this would also make a great idea for party favors!

Other posts you might enjoy…